Histudy - PHP - Documentation
Welcome to Histudy ! Get familiar with the Stripe products and explore their features:
Working with Doc
You can any work by following our docs
Formatting Content
Our content is more formating for your website
Perfect Responsive
Our Template is full Perfect for all device. You can visit our template all device easily.

Sass Available
The tamplate has Sass available for css. You can Change css by sass
Fast Loading Speed
Histudy is faster loading speed. Histudy create your template so much faster
24 Support System
We are provide 24 hours support for all clients.You can purchase without hesitation.
Getting Started
Welcome to Histudy ! Get familiar with the Stripe products and explore their features:
To use Histudy For Next-gen all-in-one Online Courses & Education PHP Template. It comes with PHP and Bootstrap5. We created with component-based and developer-friendly modern. It comes with modern design and a faster loading PHP template. It has available Home Default, Course School, Online School, Kindergarten, Classic LMS, University Status, Instructor Portfolio, Language Academy, Gym Coaching, Online Course, Single Course, marketplace, University Classic, Home Elegant, Home technology, and other needed inner or details pages availability.
Histudy Core Features
- Build with PHP & SCSS
- Responsive layout (desktops, tablets, mobile devices)
- Built with Bootstrap v5.0.2
- Well structured code
- Hinted Typography
- Dark Mode Available
- RTL Available
- Sass Available
- W3 Valid 100%
- Fast Loading Speed
- Cross Browser Support
- Dedicated Support, Lifetime Updates
- And much more …
What's Included
After purchasing Histudy template on templateforest.net with your Envato account, go to your Download page. You can choose to download Histudy PHP template only or the entire Histudy template package which contains the following files:
- Histudy PHP template: A .zip file with all .PHP files with all necessary assets.
- Documentation: An HTML format documentation.
- Licensing.
How to Install Histudy PHP Templates
Installing the Histudy template is different from installing a WordPress or CMS theme. In fact, the term "installation" doesn't really apply to the Histudy PHP template. Why? Because there’s no traditional installation process like with other CMS templates.
1. Install PHP
If you're using XAMPP, WAMP, or MAMP, PHP should already be included. Make sure your server environment (Apache, Nginx, etc.) is configured to work with PHP. If PHP is not installed, you can download it from the official PHP website.
2. Install Node.js
Download and install Node.js from the official Node.js website. This will allow you to run npm commands, which are necessary for managing dependencies and building your project using Gulp.
3. Install XAMPP or WAMP
If you haven't already, install XAMPP or WAMP to provide the necessary server environment for running PHP locally on your computer. Once installed, start Apache and MySQL services.
4. Move Your Files to Desired Location
Move the extracted Histudy template files to the folder where you want to store them. This should be inside the directory configured by your local server (e.g., `htdocs` in XAMPP).
5. Install Dependencies Using npm
Open the Command Prompt or Terminal, navigate to your project folder, and run the following command:
npm install
This command will install all the necessary dependencies, including those required for Gulp and SCSS compilation.
6. Run Gulp to Compile Files
After installing the dependencies, run the following command to start the Gulp task runner:
gulp
Gulp will compile all your files and output them into the designated `dist` directory, which can then be served by your PHP server.
7. Start Your Local Server
Start your PHP server. If you're using XAMPP, WAMP, or MAMP, start Apache. Navigate to
http://localhost:{{PORT}}
in your web browser to view the Histudy template in action. Be sure to specify the correct port number if necessary (e.g.,
http://localhost:{{PORT}}
).

Step - 1: Add the RTL Attribute to the HTML Tag:
                                                    <!DOCTYPE html>
                                                    <html lang="en" dir="rtl">
Step - 2: Include the RTL CSS File:
Ensure you link to an RTL CSS file in the <head> section of your HTML
<link rel="stylesheet" href="assets/css/rtl-style.css">
Step - 3: Include the Bootstrap RTL File:
<link rel="stylesheet" href="assets/css/bootstrap.rtl.min.css">
3. To Convert Histudy into Dark mode
Step - 1: Include the JavaScript File:

<script src="assets/js/vendor/jquery.style.switcher.js"></script>
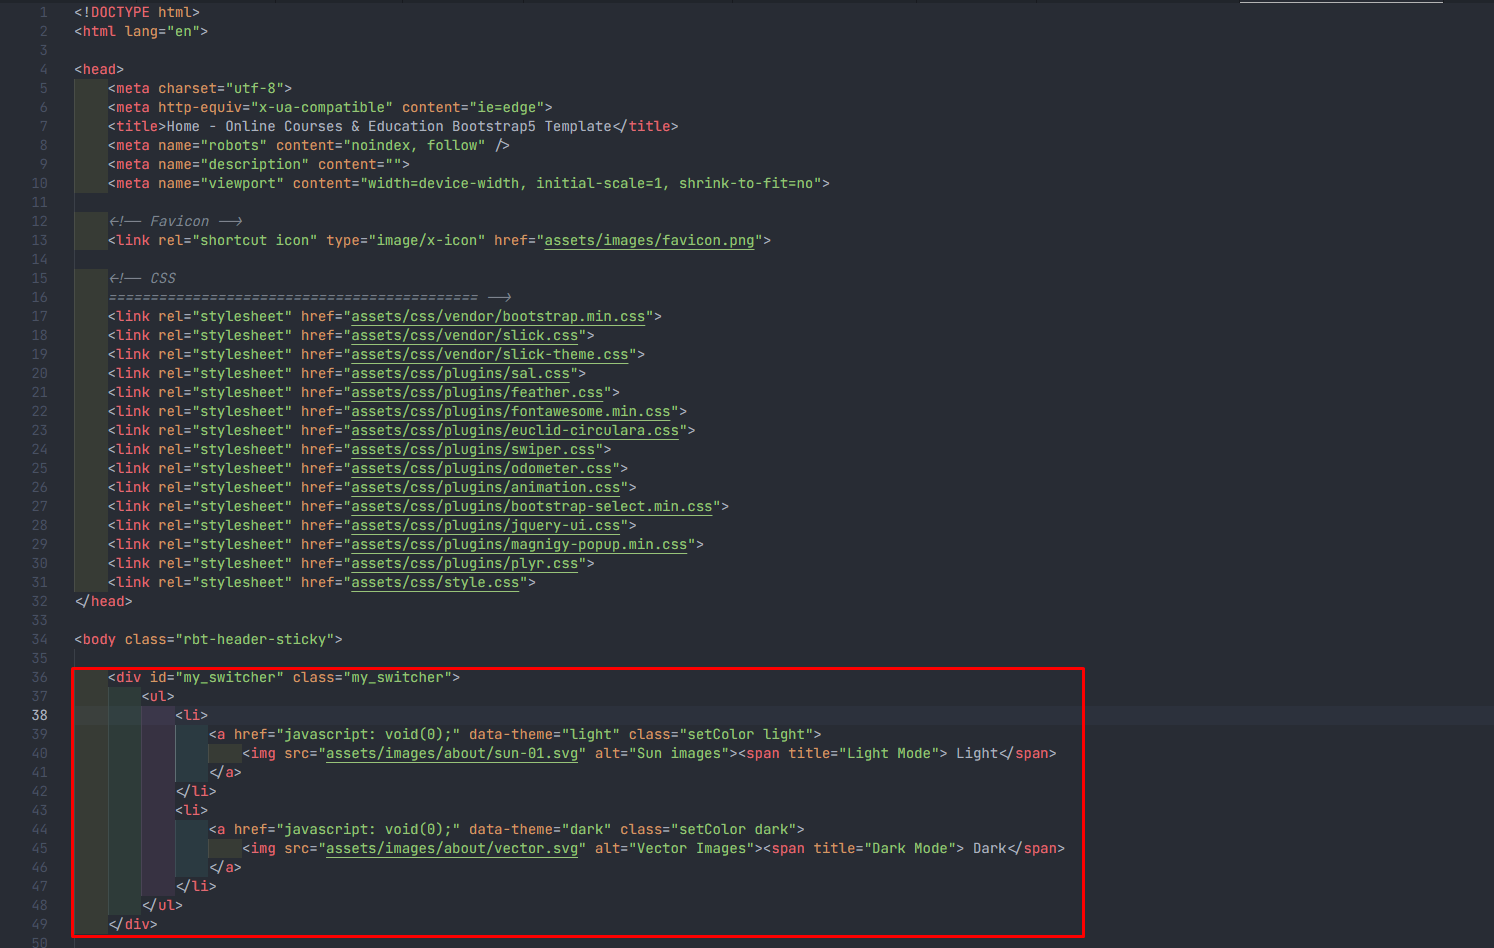
Step - 2: Include this PHP code to active the converter:

                                                            <div id="my_switcher" class="my_switcher">
                                                                <ul>
                                                                    <li>
                                                                        <a href="javascript: void(0);" data-theme="light" class="setColor light">
                                                                            <img src="assets/images/about/sun-01.svg" alt="Sun images"> <span title="Light Mode"> Light</span>
                                                                        </a>
                                                                    </li>
                                                                    <li>
                                                                        <a href="javascript: void(0);" data-theme="dark" class="setColor dark">
                                                                            <img src="assets/images/about/vector.svg" alt="Vector Images"> <span title="Dark Mode"> Dark</span>
                                                                        </a>
                                                                    </li>
                                                                </ul>
                                                            </div>
Step - 3: To switch logo:

                                                        <div class="header-info">
                                                            <div class="logo logo-dark">
                                                                <a href="#">
                                                                    <img src="assets/images/logo/logo.png" alt="Education Logo Images">
                                                                </a>
                                                            </div>

                                                            <div class="logo d-none logo-light">
                                                                <a href="#">
                                                                    <img src="assets/images/dark/logo/logo-light.png" alt="Education Logo Images">
                                                                </a>
                                                            </div>
                                                        </div>
Step - 4: To change Breadcrumb add this class name

                                                        <div class="breadcrumb-dark">

                                                        </div>
Step - 5: Extra class name
add "rbt-dark-header-8" this class name into kindergarten page

add "dark-bg-color-white" this class name into Udemy Affiliate Page

4. Package comes with documentation unzip the download package, you’ll found a folder with all template files, like above screenshot.


Social Share
Showcase of Social share. See below image and code for more information.
.transparent-with-borderclass For Transparent with border style..with-gradientclass For Hover gradient style..with-bg-primaryclass For With Bg Primary Color style..icon-nakedclass For naked style.<ul class="social-icon social-default"> <li><a href="https://www.facebook.com/"> <i class="feather-facebook"></i> </a> </li> <li><a href="https://www.twitter.com"> <i class="feather-twitter"></i> </a> </li> <li><a href="https://www.instagram.com/"> <i class="feather-instagram"></i> </a> </li> <li><a href="https://www.linkdin.com/"> <i class="feather-linkedin"></i> </a> </li> </ul>